Plinko

Plinko Thumbnail Plinko Midgame Plinko GIF

Link to Plinko Source Code

Background

In December 2021, I began to teach myself Python by watching YouTube videos and copying the programs in tutorials. After completing a few multi-hour videos over a few weeks, I decided in early January 2022 that a good way to test what I had learned would be to start a project from scratch and see how much content I remembered. I knew I wanted to create my own version of a classic game, such as Snake, Tetris, or Tic-Tac-Toe, but I felt that those were overdone. I wanted to create something that I hadn't watched other people create already, so I decided to create a Plinko game.

Concept

The concept of Plinko is simple. The player, starting with some amount of money, places a wager on their chip. Then, the player selects one of several slots to drop a chip into. The chip falls down a board of pegs, bouncing left and right randomly until it reaches the bottom. Depending on the horizontal position of the chip, it will fall into one of several slots, each with a different multiplier. Based on the original wager placed at the beginning of the round, the player will either gain or lose money. The player can then change the wager if they wish and continue playing or quit.

Process

Being that this was my first real project, I knew that I would run into a lot of problems. I had heard people say "90% of programming is debugging", so I knew issues would arise fast. Sure enough, I ran into countless bugs that brought my workflow to a standstill. Without having any experience in debugging code, I had to fumble my way through these problems and create as many "good enough" solutions as I could. I looked up error messages, read forum posts, made changes, and did everything I could think of to just get my program running again. It was winter break, so I'd spend all day on my laptop working on my Plinko game, trying to make it as quality as I could while fighting off all these errors. After about two straight weeks of working on the game, I had a product that I was satisfied with. It didn't look the best, nor did it work the best. Despite that, I was proud of what I had created in such a short amount of time. I'd spend a few hours every once in a while cleaning up the source code, fixing new bugs that I'd find, and polishing it up before declaring it complete about a month after starting.

Reflection

Looking back at the source code now, about a year and a half later, two things stand out drastically to me. The first is that my knowledge of data structures has increased dramatically. While I still have a long way to go in that field, there are many areas I see for improvement, such as lengthy if-else blocks that could have been HashMaps. More notable, however, is my use of comments, or lack thereof. Early in my programming career, I despised commenting my source code. I found it to be a waste of time. The code was simple enough that anyone could understand it. I figured that when I eventually came back to this with much more knowledge, I would have no problem reading through this code. It turns out that I had no idea how important commenting was. After looking through the source code, it feels like I didn't create this program. Although my commenting practices have gotten much better, this brought to my attention just how important it is to properly document the process of programming through comments. Moving forward, I will pay much more attention to commenting to assist in clarity.

Tic-Tac-Toe

TicTacToe Thumbnail TicTacToe Midgame TicTacToe GIF

Link to Tic-Tac-Toe Source Code

Background

Feeling confident in my abilities, I immediately set out on my next game. At the end of January 2022, I started my second project a Tic-Tac-Toe game. I assumed that this would be a simple project since every Google search for "beginner CS projects" provides Tic-Tac-Toe as one of the first results. Going in, I felt confident that I would complete this in only a few days and then move to something else. It turned out, however, that the simple game of "Connect 3" wasn't going to be that easy.

Concept

Two players alternate turns of placing their symbol, X or O, in a 3x3 grid. Whichever player can place three of their symbols across the board, be it horizontally, vertically, or diagonally, is the winner. It is a very simple game to play, which makes it a common project for beginner developers to create.

Process

Many aspects of the game were simple. Drawing a shape on a screen was something I became very familiar with throughout the development of my Plinko game. Setting up the board and pieces took no time at all. Likewise, creating the controls was also very simple. However, this project required something that the previous game did not: memory storage. I needed to figure out a way to keep track of which pieces were placed where, check for win conditions, and deny placement on occupied tiles. I ended up using lists to store everything because that was all I knew at the time. Calculating coordinates for the spaces was tedious, but once I did, I had no issues programming the movement of the pieces. The part of this project that gave me the most difficulty was checking for win conditions. Having triply nested lists made it nearly impossible to follow what was being evaluated at any given time, and the lack of comments only made things more tricky. Once I was able to solve that issue, new ones arose. I recall struggling for hours trying to get the selected square to be highlighted yellow, and as soon as I figured it out, the pieces would disappear when placed. It felt as if every time I fixed one thing, a new issue would arise. It appears that it got to a point where I gave up, as there is a feature in my code that is supposed to change the color of the screen to whichever team's turn it is, but it does not work. While I could fix it or remove it, I prefer to leave things as they were when I finished them. Not only does it show my shortcomings at the time, but it also serves as a symbol of growth and experience when looking back.

Reflection

After reviewing the code, while I did notice some improvements such as better organization, it was quite clear that I had a lot of improvement still in me. At this point, I still knew nothing about data structures, so I used what I knew. I stored everything in lists and iterated through them constantly to check for conditions that could not possibly be met at certain times. It would have been much more efficient to only check these lists when the check could return positive. I also called a function multiple times when I could have written the function to take in a list. I'm not sure if I even knew that functions could accept lists as a parameter at the time. Despite all this, the area for most improvement remained commenting. My documentation of this project was far worse than that of Plinko. Going through this code, there are multiple blocks of code that I needed to go through several times to understand its function. There are only 12 comments in 200+ lines of code, they are all incredibly vague, and none of them explain what any particular line of code does, but rather what the block (and in some cases blocks) does. My biggest takeaway from reviewing this code is still a focus on commenting, but also creating better names for my variables. I have two variables named "counter" in consecutive blocks, Turtles named "marker" and "highlighter", and many variables that are the same word with increasing numbers at the end. These are all things that I have continued to improve upon as I progress.

Baseball Simulator

Baseball Simulator Loading Baseball Simulator Empty Baseball Simulator Midgame Baseball Simulator Thumbnail Baseball GIF 1 Baseball GIF 2

Background

After winter break concluded, I began my final semester at Stony Brook University. I did not create any personal projects at this time, as I was focused on my academic studies. However, I was constantly thinking of what I wanted my next project to be when I had more time in the summer. Being an avid baseball fan, I had always wanted to create baseball-themed projects. Specifically, I wanted to create a baseball game. I knew I didn't have the ability to make a real baseball game, like MLB The Show, so I took everything I learned from my class and my previous projects and created what I consider my first project, a baseball simulator.

Concept

I knew what I wanted to get out of this project. I had many reasons for wanting to create this, but among them was a way to "watch" games whenever I wanted. At the time, I was learning how to keep an official scorecard of games, and I wanted to be able to practice whenever I wanted. In order to accomplish this, I would need to give myself as full of an experience as I could. Therefore, I would need a transcript to tell me what was happening in the game, a scoreboard to confirm the number of runs and hits, and a lineup card. Aside from that, I wanted to add a way to keep track of runners visually. I drew a rough sketch of where I wanted everything to go, and then I began creating.

Process

I knew that before a game could be played, I would need some sort of database to store information about the team, such as its players' names, numbers, stats, etc. I also knew that I would need at least two teams to play the game. I created a file that contained three classes. The Player class served as the parent to the Batter and Pitcher classes, and I would use these classes to create my rosters. I went to my favorite website, BaseballReference.com, and got the rosters of my two favorite teams: the New York Mets and the Seattle Mariners. I created a Player instance of each member of the starting lineup as well as their ace starter, set-up man, and closer.

I had aspirations of making this as realistic as possible, so that if a good team played a bad team, then the good team had a better chance of winning. Therefore, I decided that I would need to incorporate the players' real stats into their instances. Once again, I went to BaseballReference and took stats such as Strikeout Rate, Walk Rate, Batting Average on Balls In Play, and Slugging, as well as the pitchers' counterparts. For each player, I took the average of each stat over the player's last few years and used it to create each player as faithfully as possible. I stored each team's batters and pitchers in a list and combined the lists to create the team roster. After importing that to my main file, I was ready to start working on the simulation.

A common process in the creation of my projects was that the graphics side of production went smoothly, but the logic of the program took much longer. I started out by drawing the scoreboard's outline and filling it with the teams' names and 0's in the R-H-E column. I created variables and Turtles to keep track of team total stats and update them as the game progressed, as well as one to update each team's inning's run box. Since these required the game to be in progress to take effect, I would bring everything together when the logic of the simulation was completed.

The user needs to know which players are on their team, so I added lineup cards to the sides of the window. While knowing which players are on the team is important, I wanted the user to be able to see which players were actively participating in the current at-bat, much like real scoreboards at stadiums. I added a little indicator next to the name of the active batter and pitcher, which moves as the active players change (though apparently I never got around to adding this to the pitchers. As previously mentioned, I will not update projects for documentation purposes).

It was at this point that I decided to work on the game's logic, which I attempted to structure as reasonably as possible. I didn't want the game to go pitch by pitch, as that would take too long. Instead, I decided to do one plate appearance at a time. A plate appearance begins when the transcript says that the pitcher is pitching to the batter. After this point, the program calls a series of functions to determine the result of the plate appearance. The flow of logic goes as follows:

  1. Does the batter strike out?
  2. If not, does the batter walk?
  3. If not, does the batter get a hit? If so, how many bases?
  4. If not, the batter hit into an out.

At each stage of the above process, a function is called with the batter's and pitcher's stats to determine whether the answer to the question is yes or no. Once a plate result has been reached, the transcript will update to inform the user of the plate result and the program will update all respective variables and graphics. After this step, the next batter steps up to the plate and the process repeats until the final out of the game is recorded, the home team walks it off, or the game ends in a tie.

The final feature to add was the scorebug, and this was the most difficult part of the simulator. Keeping track of which bases were occupied and coloring them properly was simple, but getting the outs counter and half-inning marker to work was a nightmare. My first attempt involved using Turtles to draw the shapes, but getting them in the right positions at the right times was a challenge. There was some sort of conflict between objects that caused them to disappear at times. After some time was spent tinkering with them, I realized that I could accomplish the same task by simply writing a dot and hyphen with a Turtle. After I figured that out, everything else went smoothly. I was able to connect all the graphics to the logic, and from there all that was left was some quality-of-life improvements. I added a loading screen to make the simulation feel more genuine and a speed selector in case people wanted to speed through the game. After adjusting some colors and positioning, I finished with a product I was extremely proud of.

Reflection

There are, of course, some things I would fix or improve upon, and I do plan on making an updated version in the future. The most apparent improvement would be to add more teams and a team selection feature, as well as expanded rosters. I would also like to make this more of a game by allowing the user to control parts of the simulation. This would include actions such as setting lineups, pinch-hitting/running, bullpen management, and hitting and pitching strategy, essentially turning the user into a manager. In addition, better graphics are also a point of improvement, not only statically but also dynamically. I would like to re-design the scorebug to show pitches being thrown, batters swinging, and runners moving around the bases. I would also like to include more graphics, animations, and sound effects. In terms of the code, I'm very happy with the way I organized everything. I had a lot of variables and Turtles, and I kept them structured in a way that allowed me to find whatever I needed very quickly. I also did a much better job of naming my variables more clearly. My usage of comments was still severely lacking, but it does show some progress compared to the previous projects I made.

Word Processor

WordProcessor Thumbnail WordProcessor Menu WordProcessor Resume WordProcessor GIF

Link to Word Processor Project

Background

After taking an introductory course in Java, it quickly became my language of preference. Not only did I love the Eclipse IDE, but the syntax and structure of the language made it easy to understand and fun to use. During one particular lecture, I learned about Event Driven Programming, Event Handlers, and JMenus. It was the first time I learned how to create a program that allows for extensive user interaction. Being able to create a menu bar and create buttons that would execute commands, I knew what my first project would be when summer break began. I wanted to make a basic text processor, similar to NotePad.

Concept

The basic features of a text processor include creating, loading, and saving text files. Most include many other features, including the ability to print, copy and paste text, find and replace phrases, and zoom in and out. Text processors such as Google Docs or Microsoft Word have a myriad of other capabilities, including placing images, special characters, tables, and charts, as well as text formatting. This was going to be a long-term project, so I decided that I would get the basics implemented and then slowly add more features when I found the time between projects.

Process

To start, I created a simple JFrame with a single TextArea object. At the top, I created a JMenuBar with two JMenu objects, one for "File" and the other for "Edit". To each, I added their necessary operations, such as "Open" and "Save", and attached an event handler file to each. The FileMenuHandler manages file loading, saving, and closing, while the EditMenuHandler controls commands such as copy and paste. During my Java course, I learned a lot about file I/O, so I was able to utilize code from previous projects with a few adjustments. Setting up these basics of the JFrame was simple, as it was all stuff I had done during the course. Adding the methods, on the other hand, was something new. Despite that, I didn't run into too much trouble.

Locating and selecting files to open was easy thanks to the JFileChooser, and reading in the text was simple as well thanks to the experience I obtained in my course. Creating a method to close the file was also simple. I wanted to implement a feature that prompted the user to save before exiting, and this required nothing more than a few JOptionPanes and an if-else statement to filter through the user's choices. I also added a "Force Close" option that exits immediately without saving. It serves mostly as an escape option for myself during development since I grew tired of having to go through all the messages asking me to save, but I may leave it in. The most involved method to implement was the "Save" option. The code behind saving the file was simple, as it was nothing more than having the user select a destination on their computer, naming the file, and using a FileWriter to place the text in the JFrame into the selected destination. However, because the save method was used in different contexts, I needed to make it as flexible as possible. After some thought, I decided to have the method take in a boolean parameter to determine whether the file should be closed after saving was completed or not. This required me to go through the other methods and update each time I called the save method to include this boolean. By no means was it difficult, but it did take some time to ensure that everything worked as intended.

The next step for this project is to develop the Edit Menu. Adding copy/cut/paste, undo and redo, find, find and replace, and other related methods will be the next step. This is a lengthy project and is still very much a work in progress, so check back for future updates.

Baseball Clicker

BaseballClicker LightMode BaseballClicker Thumbnail BaseballClicker GIF BaseballClicker MidGame BaseballClicker EndGame

Link to Baseball Clicker Source Code

Background

One of my favorite games when I was younger was a game called "Cookie Clicker". The game revolved around clicking a picture of a cookie in order to obtain a cookie. The more you clicked, the more cookies you got, and you could spend those cookies on things that automatically generated cookies for you. I'd have the game running in the background of my laptop as I watched YouTube videos or played other games, and I'd check in every once in a while to upgrade my buildings. I wanted to make my own version of the game, and so I decided to apply my love of baseball to the concept and create Baseball Clicker.

Concept

In order to create the basic features of this game, I needed to have a button that would give points, objects that could be purchased to automatically generate points, and upgrades that strengthen those objects. I'd also need a scoreboard to display vital information to the player. I also wanted to create graphics, since none of my other projects had anything more complex than a few connected lines and basic shapes.

Process

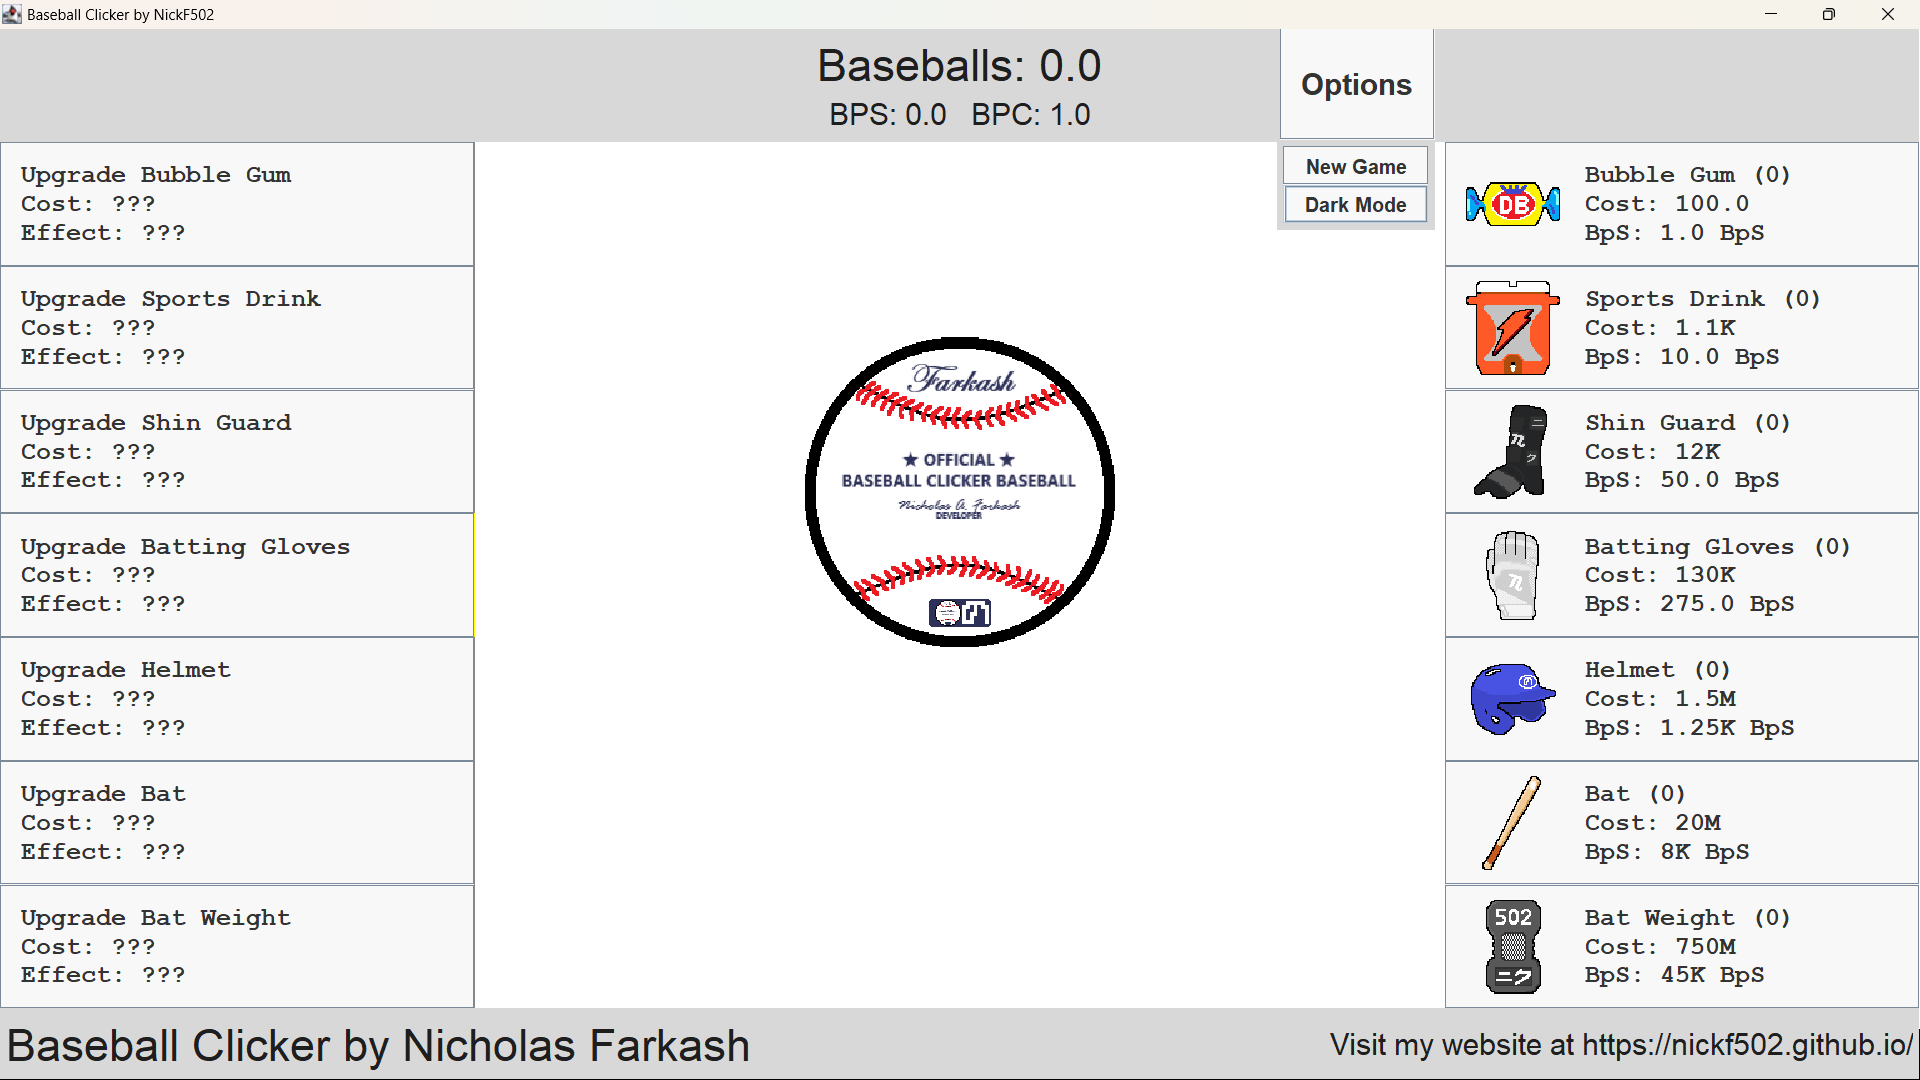
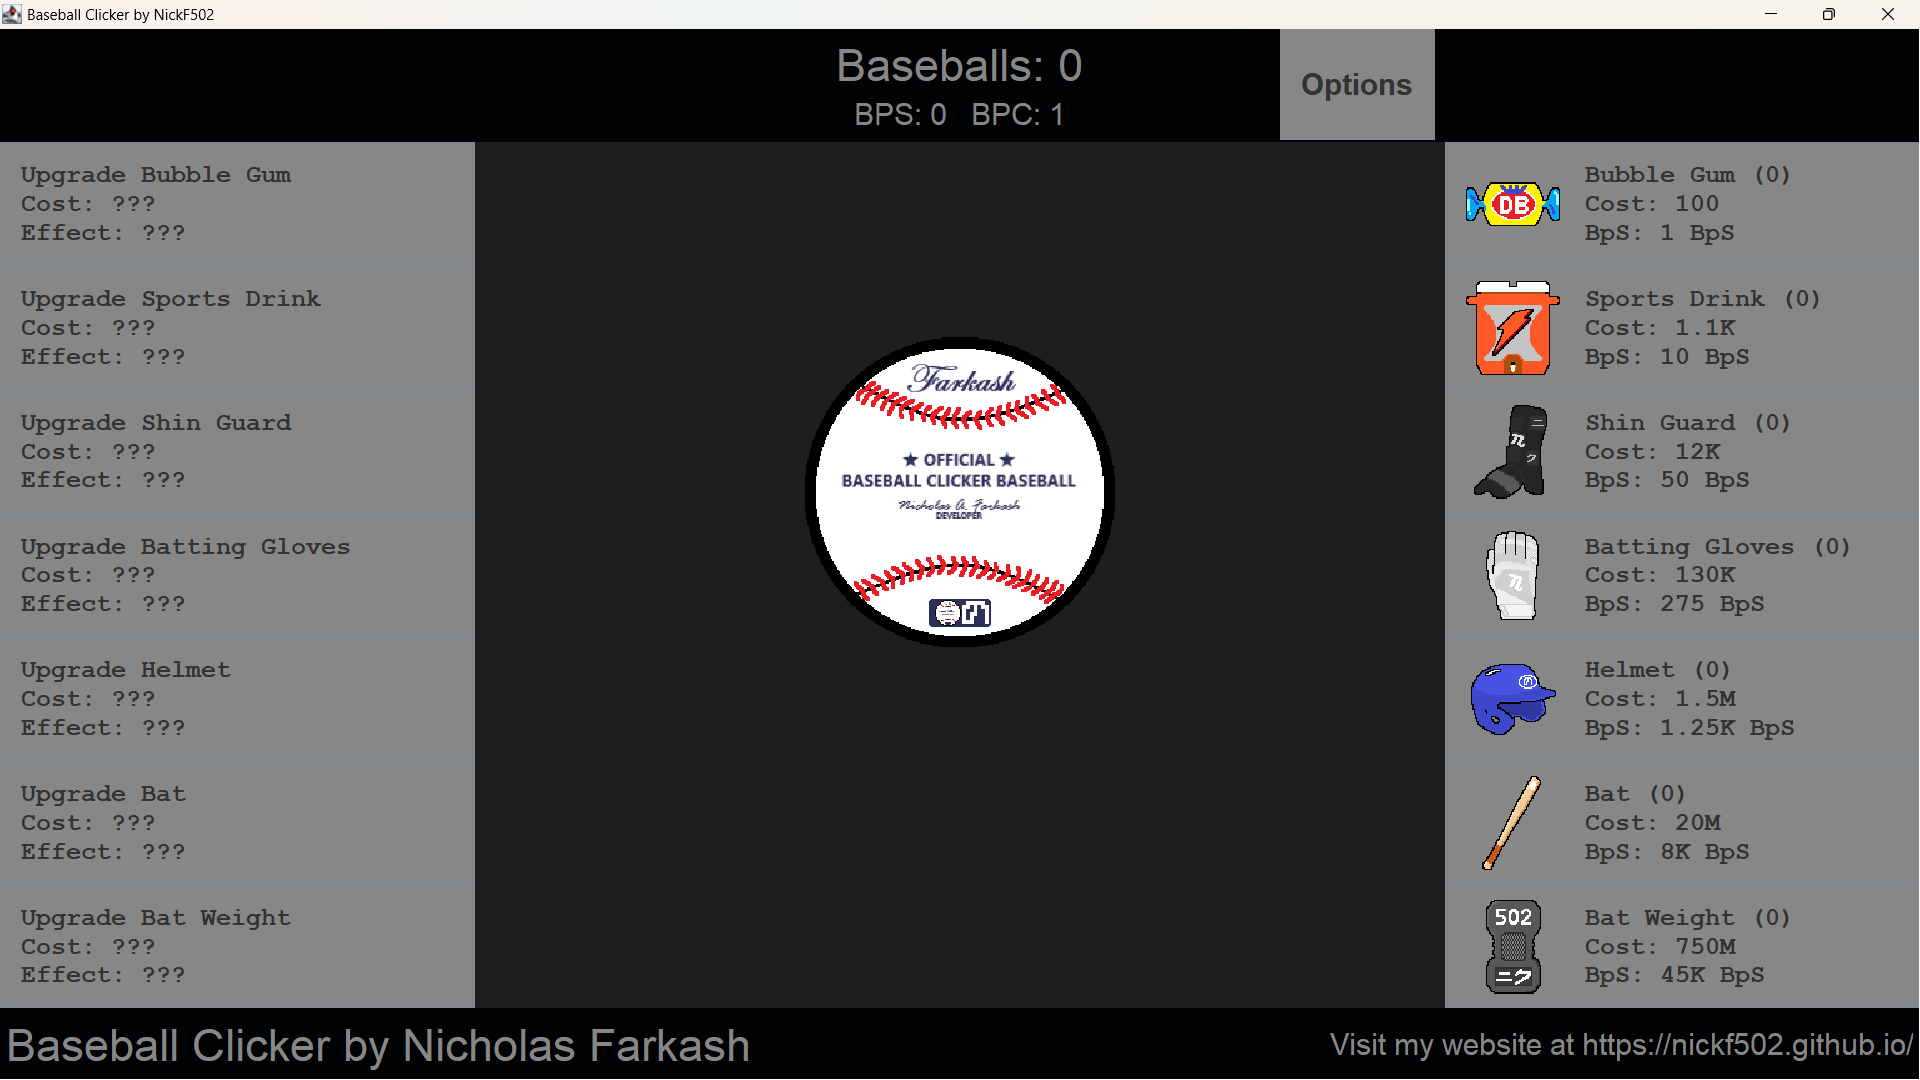
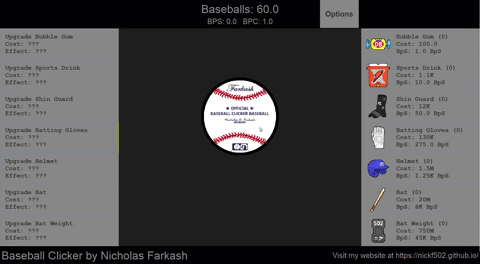
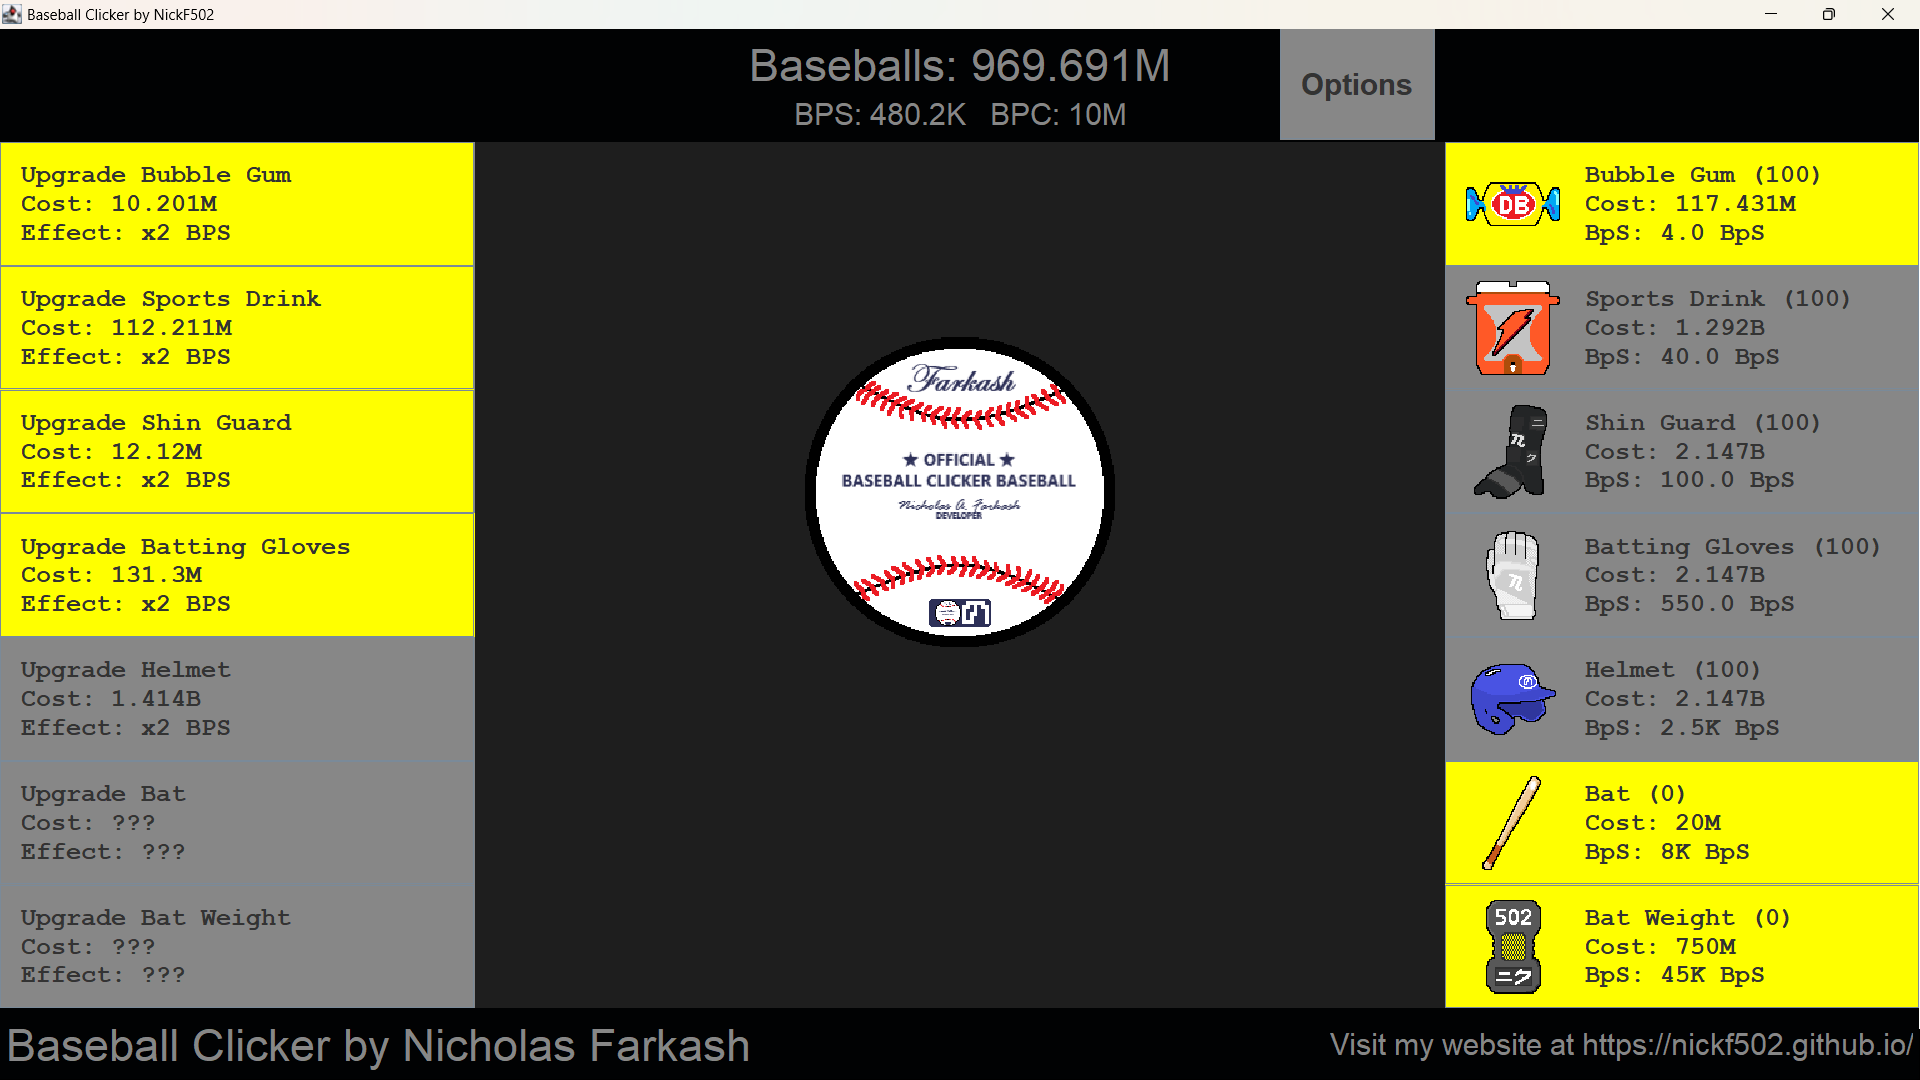
I wanted to divide the main JFrame into sections and have each section contain one core feature. In "Cookie Clicker", the cookie was on the left side of the screen, with the scoreboard above it. The center of the screen has graphics that display the number of each building you have. The right side of the screen has the buttons to purchase buildings, with the upgrades listed above it. I didn't want to copy that layout, not only because it seemed rather complex but also because I didn't have a need for such a sophisticated layout. I decided to split my screen into five sections: North, East, South, West, and Center. Thankfully this corresponds perfectly with Java's AWT BorderLayout.

The first thing I wanted to do was get the basics of the game down; click a button, and add a point to the scoreboard. I started with the button by making a class that extends a JButton, setting the image of the button to be an image of a baseball, and adding a MouseListener. Once I ensured that the clicks were being registered, I shifted over to the scoreboard, which was nothing more than a JPanel with some JLabels displaying some basic text. I set the mouseClicked() event on the JButton to update the number of baseballs the player has, and then update the scoreboard to reflect this change.

Once I had that working, I began to add equipment items, which was my version of the buildings in "Cookie Clicker". After deciding on a few baseball-related objects, I began using them to create instances of EquipmentButton, which is a class that extends a JButtons. It features all the information on an equipment type, such as its name, price, quantity, contribution to the automatically generated Baseballs per Second (BPS), and a picture of the item. Each button also contains a MouseListener. When clicked, the button runs a check to see if the item can be purchased. If it can, it decreases the user's baseball count by the price, adds one to its quantity count, and updates all related attributes. All of these buttons were in an array for future reference.

The next step was to display the buttons, which I would do by simply adding them to a JPanel. After creating the EquipmentButtonPanel class, I moved into it the code to create, store, and display each button sequentially, so the least powerful item would be at the top, similar to the original game. I set this panel to the east side of the screen and tested the buttons to ensure that they updated their information appropriately.

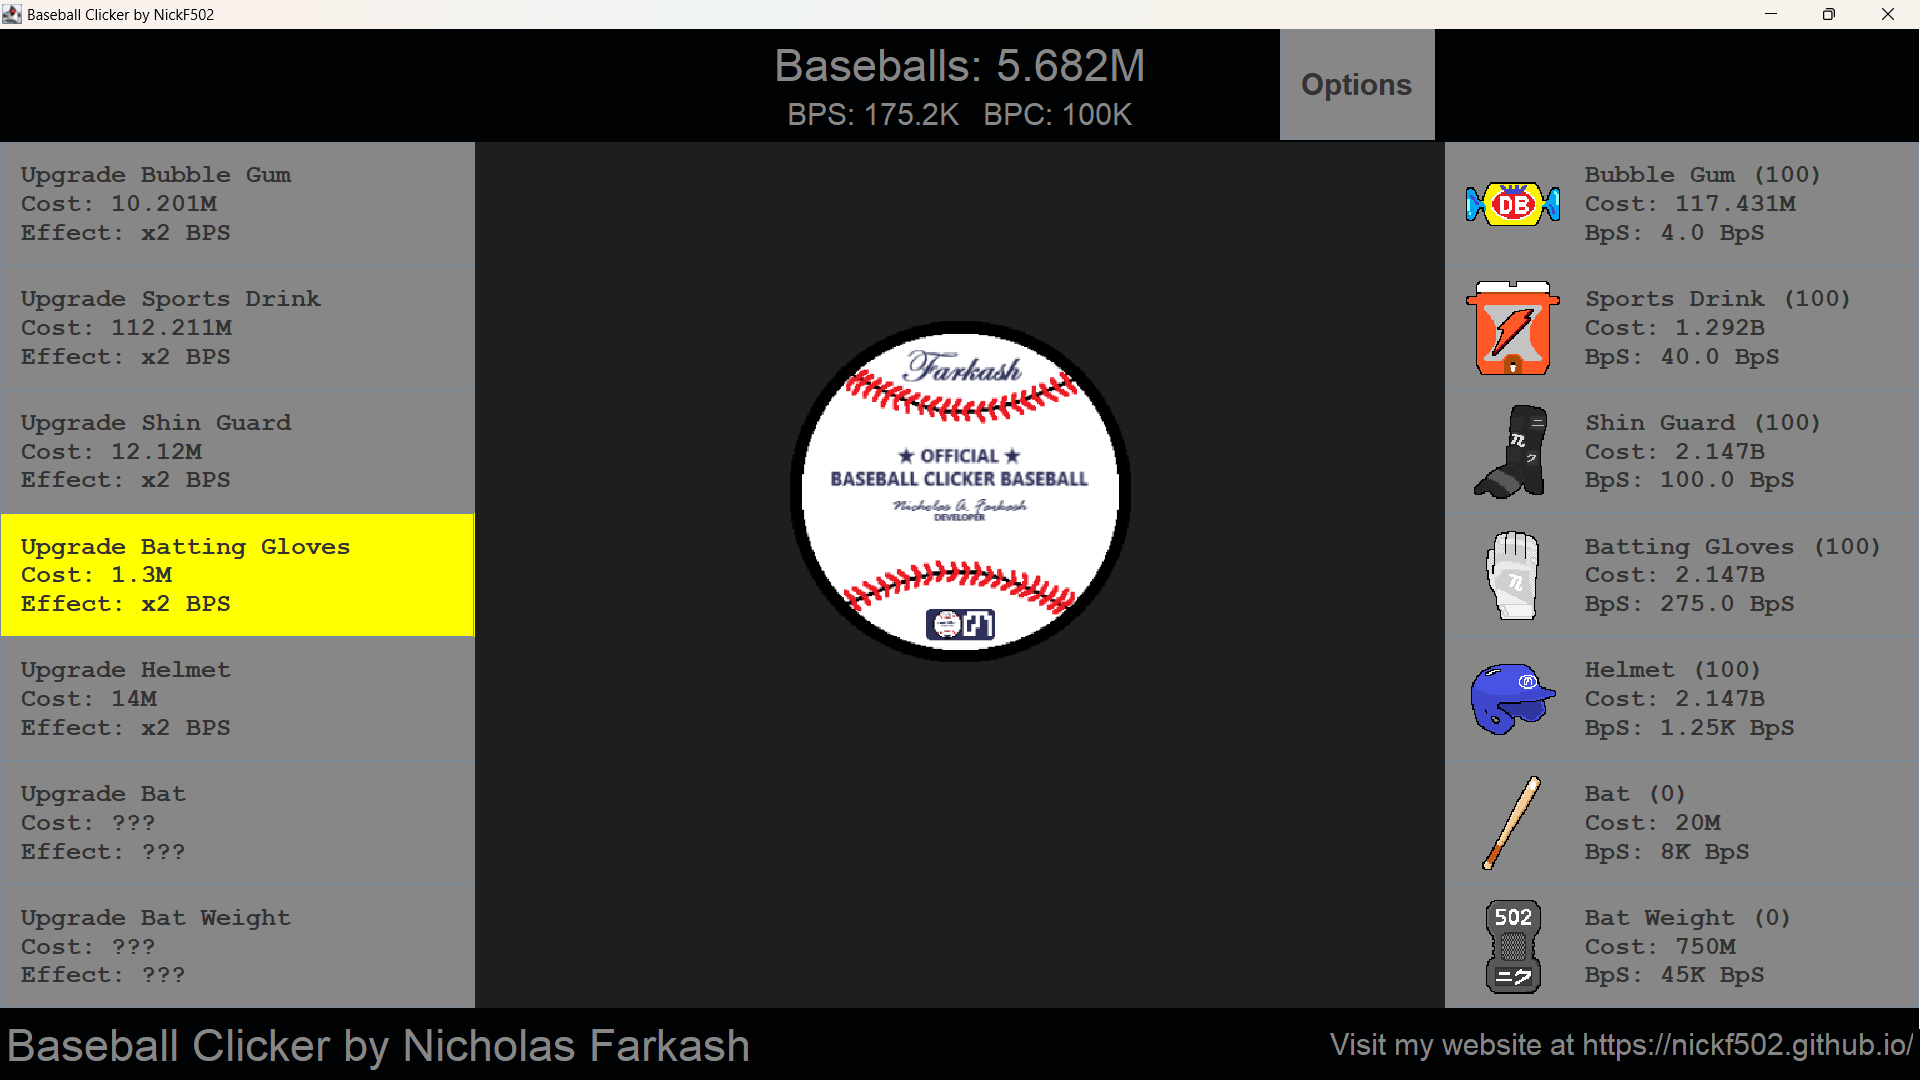
The upgrade system didn't turn out as I had originally planned. I wanted there to be different effects for each piece of equipment, so that some upgrades were a x2 multiplier, while others were a cost reduction or a package of multiple of the equipment. However, this quickly grew too complicated, so I just made all upgrades the x2 multiplier, similar to the original game. The process for creating the UpgradeButtons was nearly identical to the EquipmentButtons. The only difference was that each upgrade button needed to be linked to its corresponding equipment button, so I created a method to find the button by iterating through the EquipmentButtonPanel and retrieving its data.

The final sections that needed to be developed were the header and footer sections at the top and bottom of the JFrame. I wanted the top to exclusively contain game-related information, so the player wouldn't be distracted by anything. As such, the header primarily contains the scoreboard, which displays the number of baseballs and the current BPS. It also contains an options mode, which provides the user with the ability to start a new game or toggle a "Dark Mode", which turns the colors of the objects in the game darker. The footer contains the very brief credits JLabel and the URL of my website.

There are many smaller features in the game that I don't have time to elaborate on, such as changing the color of buttons when a purchase is possible, the layouts of the buttons and panels, and the animation on the baseball. However, there are three that I want to call special attention to.

My favorite part about this project was the art that I created. Pixel art is a hobby of mine that I don't get to indulge in often, so when I realized that I shouldn't be using pictures I found on the internet of baseball bats and helmets, I was elated that I would be creating my own work. Looking at the images used for the equipment, it is apparent that I parodied baseball-related brands, such as Dubble Bubble, Gatorade, Mizuno, Marucci, and others. Many of these were brands that I grew up using when I played baseball, and I wanted to "honor" them by including them in my game. While these were a lot of fun to create, the main baseball is by far my favorite piece of art that I created for this game. I modeled it after an authentic MLB baseball, and I love how it came out. From the signature of the "Commissioner" to the logo at the bottom, I spent hours on making these little details, and I think it came out great.

A game like Baseball Clicker is not meant to be played in a single session. As such, I needed to include some sort of save data system for the game. The very first version of "Cookie Clicker" was easily hacked, as the save data was just a concatenation of the amount of each item that was purchased. I wanted to prevent this, so I used a very basic encryption to prevent this from being accomplished so easily. I created a key to use for my encryption/decryption, which was just a number. I stored this key in the first slot of an ArrayList. Then, for every number I needed to save, such as the number of baseballs, the BPS, or the number of equipment or upgrade level, I would multiply that number by the key and store each in a different spot of the ArrayList. The key was randomized every time the game was run, which contributed to its security. I wrote the contents of the ArrayList to a file, saveData.txt, so the data could be loaded in when the user wanted to resume playing. I needed to separate the encrypted numbers in the text file with some sort of delimiter so that when the data was being read in, the numbers could be decrypted properly. As such, after each index's content was written out to the text file, I appended the zero-width character to make it hard to see at first glance where one number ended and the next began. While this is far from fool-proof, it does add an extra level of security and I had fun doing it.

In "Cookie Clicker", once numbers reached the millions, they were abbreviated to the form X.XXX M. I wanted to do the same thing, as displaying these large numbers becomes pointless when the smaller digits are changing so rapidly. As such, I needed to come up with a way to display my numbers in that format. I accomplished this using a HashMap to map the power of 10 of a number to its number suffix (M for million, B for Billion, etc.) and a function to properly format the number. This proved to be one of the most difficult parts of the game development process. After searching for a way to accomplish this, I found the library java.text, which contained a class DecimalFormat. Even with this class, I still struggled to get my function to work properly. At first, I couldn't get the decimal point in the number to be a valid delimiter. Once I solved that, more problems arose. Numbers would be displayed with the wrong suffix, the decimal point would disappear at random intervals, and other minor bugs. The biggest issue was the case where a number in the thousands was being displayed. Contrary to the way "Cookie Clicker" displays its thousands, I wanted Baseball Clicker to display the thousands with a decimal point. However, I ran into a problem where sometimes the function would format the number, and other times it would leave it. I eventually solved this problem, but it would not surprise me if other problems surrounding the number formatting system were present. If you find one, please let me know so I can fix it!

Reflection

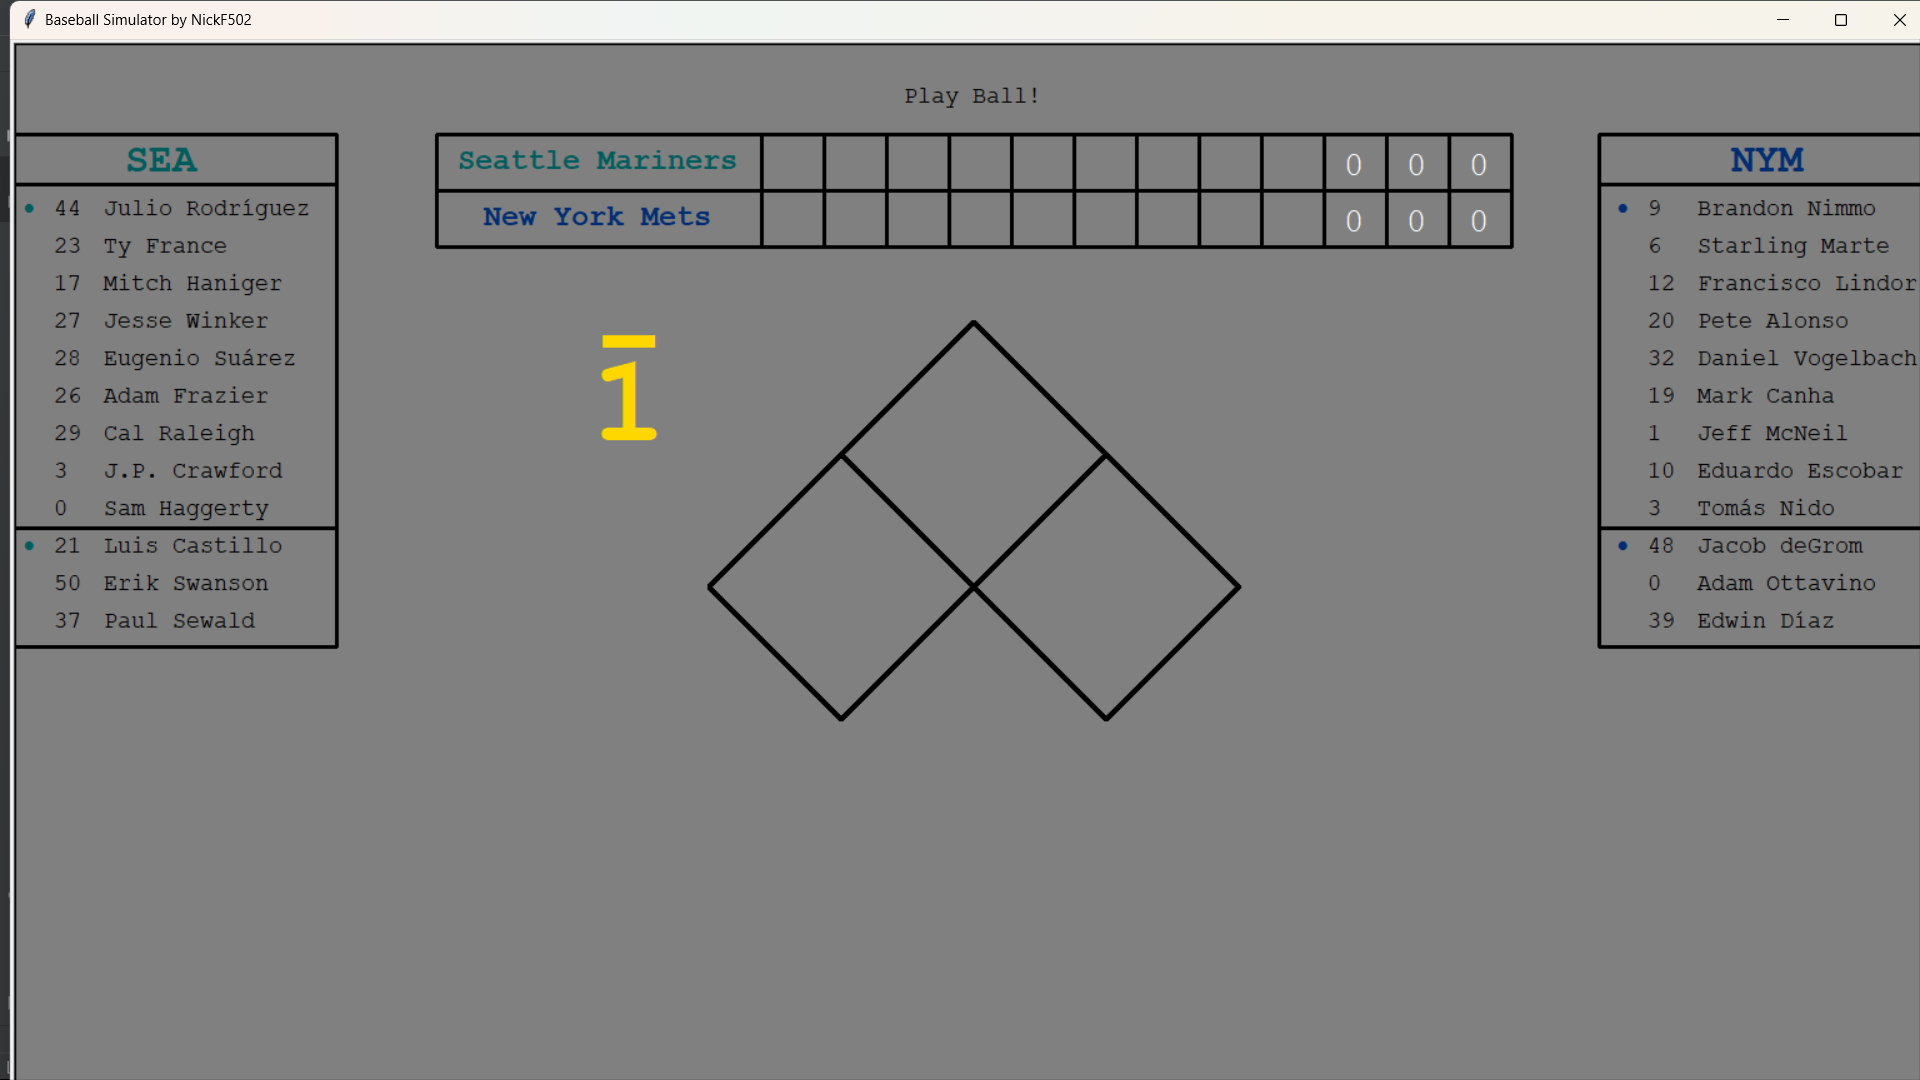
Despite how in-depth and complex this project is, I still don't feel that this is my best work. I still think Baseball Simulator is a better product, but that isn't to say that this is a poor product by any means. I take pride in the fact that I produced this game rather quickly with a fairly rudimentary understanding of Java, programming, and game development as a whole. However, there are so many areas for improvement. I think that, visually, it is incredibly bland and could use much better graphics. Sound effects and background music would be a very nice addition as well. Additional features, such as a statistics page, achievements, more upgrade and equipment diversity, and customization options would all contribute to a much better game. Maybe I will update it in the future and add some of these features.

Compared to previous projects, my commenting in this project is a drastic improvement. I learned about JavaDOC basics in class, and since I knew my commenting abilities could use an overhaul, I tried to comment as much as I could while not flooding the files. Looking through it now, it is much easier to follow along, and I was actually able to make some adjustments to the code to improve the efficiency and performance. Again, there is always room for improvement, but I think that I now have a solid foundation for commenting.